




How to make a PlayStation room feel clean, not chaotic was the question I asked after tripping over a controller three nights in a row.
I cut clutter, spent about $300, and now guests assume I’m tidy by habit. This guide shows the exact visual moves that do the work, from $50 swaps to $300 anchor pieces.
My focus here is modern minimal with a cozy gaming twist. This suits bedrooms, small living rooms, and studio apartments.
Budget from a quick refresh under $200 to a fuller setup around $400 to $800. Lately I notice gamers leaning toward Japandi textures and neutral streaming backgrounds.
1. Start with the Foundation: Layout and Rug Anchor


Pick your visual center first. The rug sets scale, grounds the console, and keeps controllers from floating around.
I use a Low-pile area rug 5×7 that sits just under the front feet of the media console and two inches under the coffee table. The rule I follow is: rug at least as wide as the console, with 6 to 12 inches of visible edge in front.
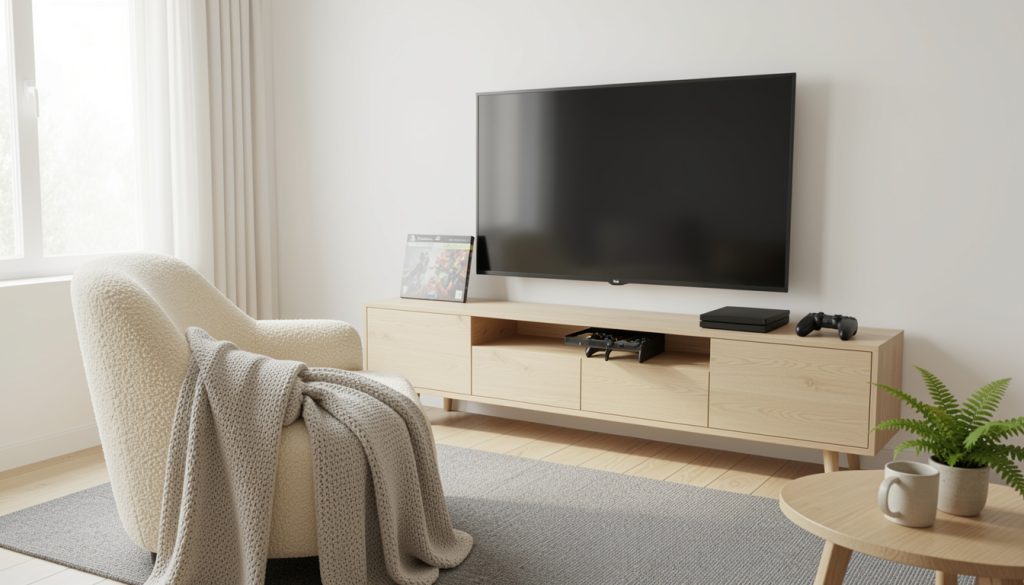
A sturdy media base keeps games and consoles aligned. I replaced a cheap stand with a Matte black TV stand 48 inch to create a clean horizontal line.
The visual principle is scale and balance. Large rug plus long console equals calm. Mistake people make is a rug that is too small. That makes the console look like it is floating. Do the opposite and pick a rug that reads intentionally sized.
2. Hide the Chaos: Storage and Cable Tactics


The trick is to make storage look edited rather than overflowing.
Use a Console table with drawers 48 inch so remotes and cables disappear. Add a Cable management box behind the console to corral adapters and power bricks.
Visually group controllers on a small tray to avoid the scattered look. The design principle is containment. Closed storage reads clean. Open shelving with too much small gear reads messy.
A common error is using only open shelving for games. Instead, alternate closed drawers and a single display shelf. Your shelf should hold one focal object per foot of shelf length to keep proportion intact.
3. Layer Warmth with Textiles and Soft Surfaces


Textiles soften screens and absorb sound while making the room feel lived-in.
Choose a pair of Boucle throw pillow 20×20 and a Knit throw blanket 50×60. Place pillows off-center on the chair and drape the throw with one corner casually on the rug.
The visual principle is texture contrast. Soft textiles against matte metal and oak read intentional. People often over-coordinate color. Instead, keep pillows neutral and add one accent color in a small item for balance.
Tip: fold your throw in thirds, then drape so one third hangs on the floor. That small asymmetry sells the look as lived-in, not staged.
4. Add Height and Drama with Wall Art and Vertical Lines


Wall art gives your eye a destination and reduces the scrolling clutter on the console.
Hang a Matte black gallery frame set centered over the media console, spacing frames 2 to 3 inches apart. Add a Floating oak wall shelf 36 inch below for one curated object.
The eye-level rule applies: center of the main artwork sits around 58 to 62 inches from the floor for a natural viewing height. Mistake: too many small frames in random clusters. Instead, go with one anchor piece and one shelf to support it.
If you collect game boxes, rotate one in a frame or on the shelf as a deliberate display rather than a pile.
5. Create Ambiance with Warm Diffused Lighting


Layer three light sources for polish. A floor lamp, a table lamp, and subtle bias lighting behind the TV create depth without flash.
I use a Brass floor lamp with dimmer and Warm white LED strip with remote tucked behind the console at eye level. Bias lighting reduces screen contrast and protects your eyes.
The principle here is layered illumination. Mistake: relying only on LEDs. Too much cold color reads cheap. Balance warm tungsten tones with the LED for a cohesive feel.
Common Styling Mistakes to Avoid
Mistake: Too many RGB LED strips everywhere
Why it doesn't work: Rainbow lights compete with decor and fragment the space.
Do this instead: Use a single Warm white LED strip with remote behind the TV for subtle bias lighting.
Mistake: Rug that is too small for the console
Why it doesn't work: Makes the media center feel disconnected and chaotic.
Do this instead: Choose a Low-pile area rug 5×7 that extends beyond the console front.
Mistake: Open shelves stuffed with boxes and cables
Why it doesn't work: Visual clutter that reads unplanned.
Do this instead: Store loose items in a Media storage cube organizer and display one object per shelf foot.
What You'll Need for This Look
Foundation Pieces
Low-pile area rug 5×7 around $50 to $120
Matte black TV stand 48 inch around $130 to $320
Textiles & Soft Goods
Boucle throw pillow 20×20 approx $20 to $45
Knit throw blanket 50×60 approx $25 to $60
Lighting
Brass floor lamp with dimmer around $80 to $220
Matte ceramic table lamp approx $35 to $90
Finishing Touches
Matte black gallery frame set around $25 to $70
Floating oak wall shelf 36 inch approx $40 to $120
Budget Swaps
Console table with drawers 48 inch thrift find alternative at Habitat for Humanity ReStore, Amazon backup available around $100 to $220
Shopping Guide for This Look
Buy the rug first: Rugs go fast in your size, pick a Low-pile area rug 5×7 early to set scale.
Thrift the standout: Look for a secondhand oak console, then order a Matte black TV stand 48 inch as a backup.
2025 trend tip: Japandi neutrals work great as streaming backdrops, add a Matte black gallery frame set for a calm focal point.
Splurge vs save: Splurge on lighting like a Brass floor lamp with dimmer, save on pillows with budget boucle options.
Conclusion
Start with one high-impact change, like the rug or the TV stand, and build from there. Small changes to scale, storage, and lighting add up faster than a full overhaul.
Which one of these changes would you try first in your PlayStation room?